Just to go with the formality flow, let’s first define a snippet. According to wikipedia, a Code Snippet is a programming term for a small region of re-usable source code or text. Ordinarily, these are formally-defined operative units to incorporate into larger programming modules. Snippets are often used to clarify the meaning of an otherwise “cluttered” function, or to minimize the use of repeated code that is common to other functions.
Visual studio allows us to add our own code snippets for reuse of common block codes in current or further projects. Custom code snippets can be adhered to the ones bundled with the IDE. These can be created and edited with the text editor of your preference. Snippets are handled as XML files, which follow a XML Schema from Microsoft. This schema contains the definition of mandatory elements and attributes for the snippet to work.
Since the 2005 release, code snippets were introduced as part of Visual Studio. Visual Studio 2005/2008 itself has pre-bundled snippets for
surrounding or inserting code blocks. Visual Studio also allows code snippets to be added to the toolbar by simply pasting the code block into it. You could create different tabs to classify them.
How to create your own custom code snippet in Visual Studio 2005/2008
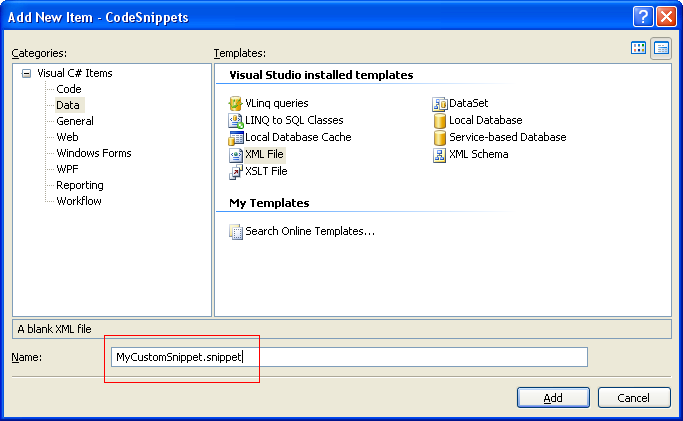
1. To start, let’s create an XML file with a *.snippet extension. This file will contain our snippet attributes, as well as the desired code block.
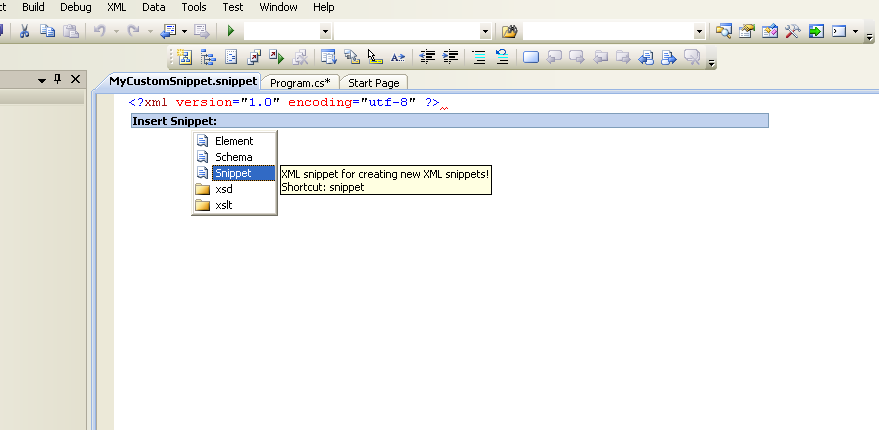
2. Ironically, let’s use the “snippet” snippet which comes pre-bundled with Visual Studio. This will inject into our file the snippet XML structure.
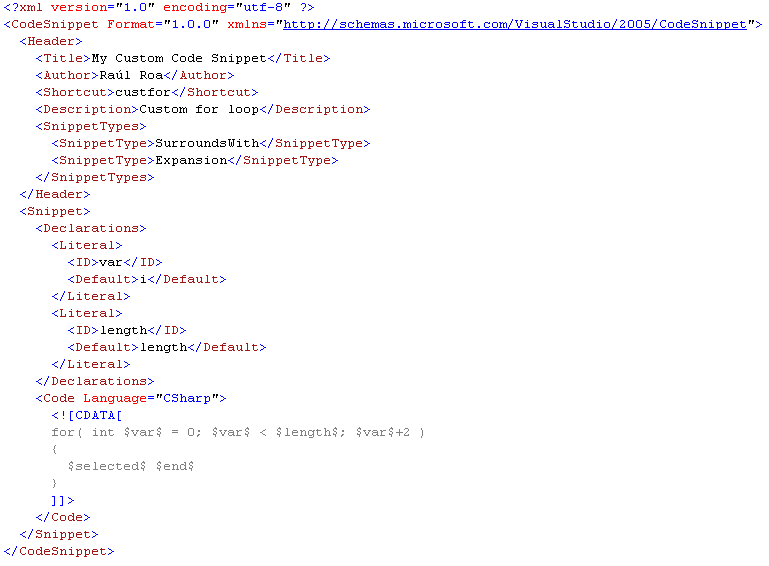
3. Edit the snippet template by filling in the necessary values.The type for the snippets may vary depending on what we want to achieve, we may only want to insert a block code, or surround one with the desired snippet as well. The declarations correspond to de variables that may be edited from the code edit or (Visual Studio) and they must be referred between \$ on the code element. We must specify for what language is the snippet as well.
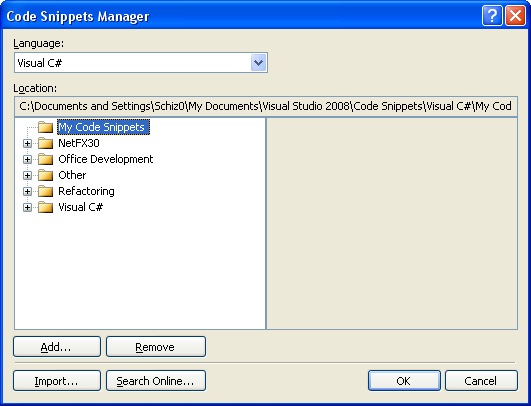
4. After editing the file, the next step is to open the Code Snippets Manager from the tools menu. On the Code Snippets Manager by selecting add, we are going to be able to add a complete folder containing our code snippets. If we want to import one specific snippet into a selected folder we just have to click on Import.
Using our custom code snippet
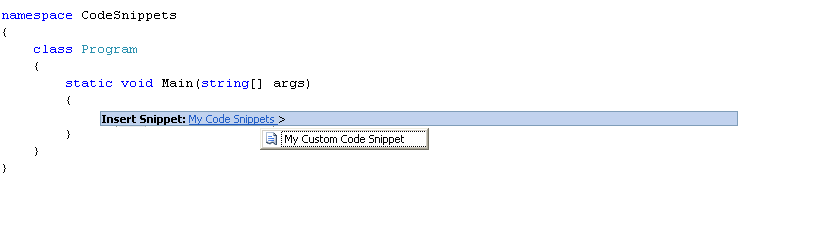
So let’s use our code snippet. We can select it from the insert code snippet in the Visual Studio context menu (right click on the class file), or we can use our defined shortcut and press tab twice to import the block of code.
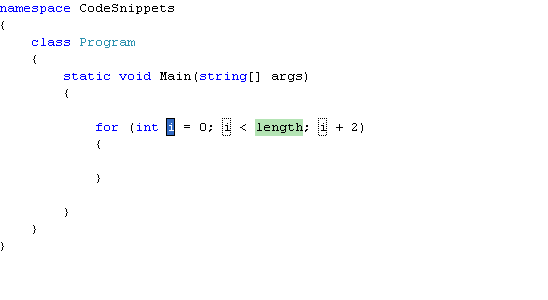
The Result!
So here it is ladies and gentlemen, our custom code snippet!
Summary
The purpose of this article is to highlight a very useful feature from Microsoft’s IDE. A cool feature we should exploit in order to gain the most of it, and that not many people gets to take advantage of. Grabbing a code block that is constantly reused and insert it from with the help of the IDE whenever we need it, boosts our productivity significantly. Also, this feature encourages the developer to embrace re-usability when designing a piece of code.