Authentication is a must have feature for every system. Every system administrator needs to give an identity to the ones using their system. Which leads us, developers, to make this repetitive process something easier to implement and reuse every now and then on any application that may need user login.
I have seen many "authentication libraries" which encapsulate simple verification routines into assemblies, that can be implemented as easy as just creating a reference and running a SQL script against the DB. Back in the day, even I made one of those and felt 1337 because of my glorious creation. That was until I met the provider model, which reduced the greatness of my crappy library or I may say, reinvention of the wheel to nothing.
The provider model involves many other things that go a lot further than just user authentication, resource permissions, etc. For now I’ll address the ones related to user management and their default implementation.
What? More sh*!t aboutMembership/Role/Profile Provider?!! Why should I care?
Let's start by saying that this is not something new. The provider model has been around since ASP.NET 2.0, therefore 5 years ago you could’ve done this without any problem the same way I’m gonna do it now. The deal is that people rather read or download an example from a blog, than actually spend some time reading about how the thing works and what’s the most suitable way of implementing it depending their given situation.
Instead of trying to write a manual of how to do it, I’ll try to explain why use the default or simplest form of the provider model for user management rather than opting for a custom membership provider. Of course if you are able to choose how to handle your users and you don’t stick an existing form of user authentication into your app. Either way I encourage you to drop your 1337 implementation, and use this since the Login controls work out of the box.
My intention is to eradicate the taboo surrounding this, and really show how simple it is to make this work along with our application without any effort at all.
To Customize the provider or not to customize the provider
So, in order to make the provider a viable solution they had to make it flexible. And it is. By simply extending the membership, role or provider base classes you can implement your own customization of these providers. The thing is that people tend to opt for this without hesitating falling again into the loop of reinventing something that it’s already done for you.
Everything resumes to this: Unless you have to use a pre-defined structure for the users database your option will be a custom implementation of the membership/role/profile providers. But if you are using ASP.NET 2.0 or higher (obviously), MSSQL, and do not have to use an existing user base you shouldn’t create your custom provider. There are also ports of the ASP.NET Application Services DB for Oracle, MySQL and Postgre, so there are not excuses for this.
The usual excuse for resistance of using the default implementation of the provider is theassumptionof "having to rely on the username field and having alphanumeric fields as FK's among the whole system might affect performance". This, even though it sounds technically convincing it's a lie. All the relationships on the default DB schema are made using GUID’s which definitely knock off this vague excuse. Obtaining the user's unique identifier takes as little as two lines of code, so don’t let that stop you.
Avoiding the implementation of a custom membership/role/profile provider WILL save you time and let you focus on other tasks more important than user administration and resource permissions.
OK, so where’s the code?
Since I'm not addressing a custom implementation of any of the providers being discussed. It's only going to be necessary to configure the providers using the web.config or the ASP.NET Configuration panel. There are a couple of ways of implementing the membership and role provider in its simplest form. One way is to use the ASP.NET Configuration in order to achieve it. Let's see how.
Step 1
First, select the ASP.NET Configuration option from your Website menu in Visual Studio.
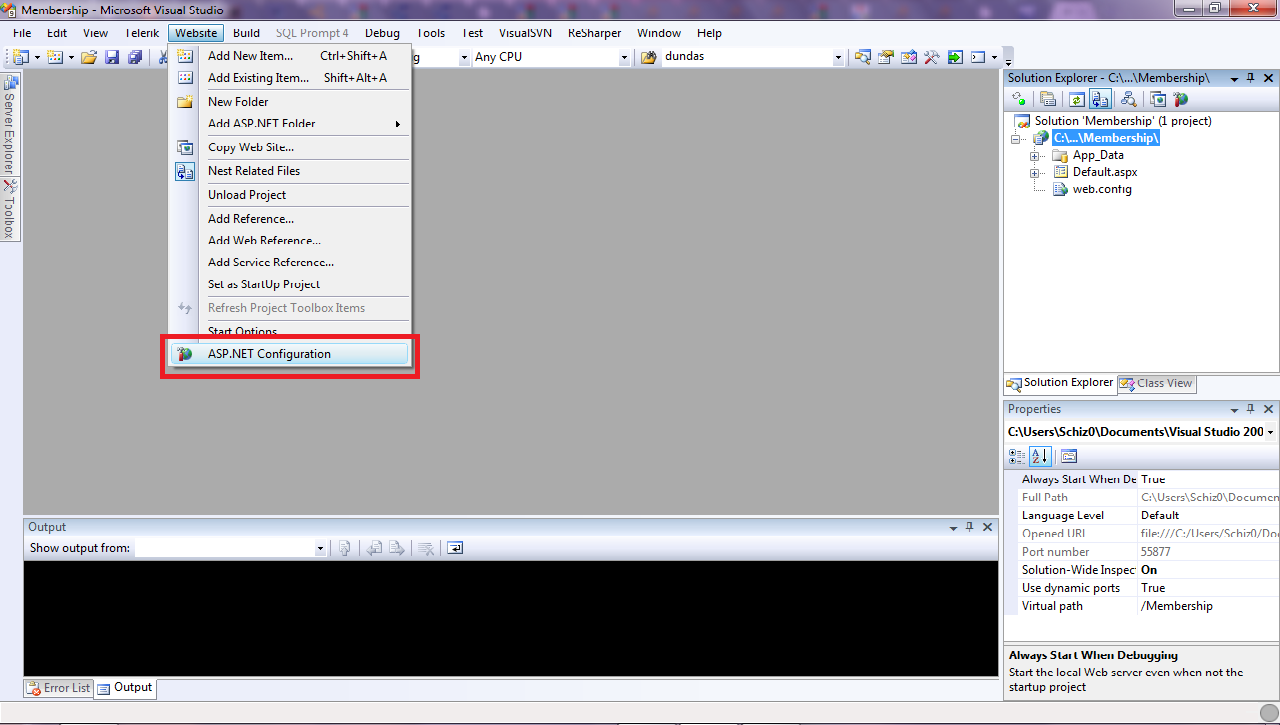
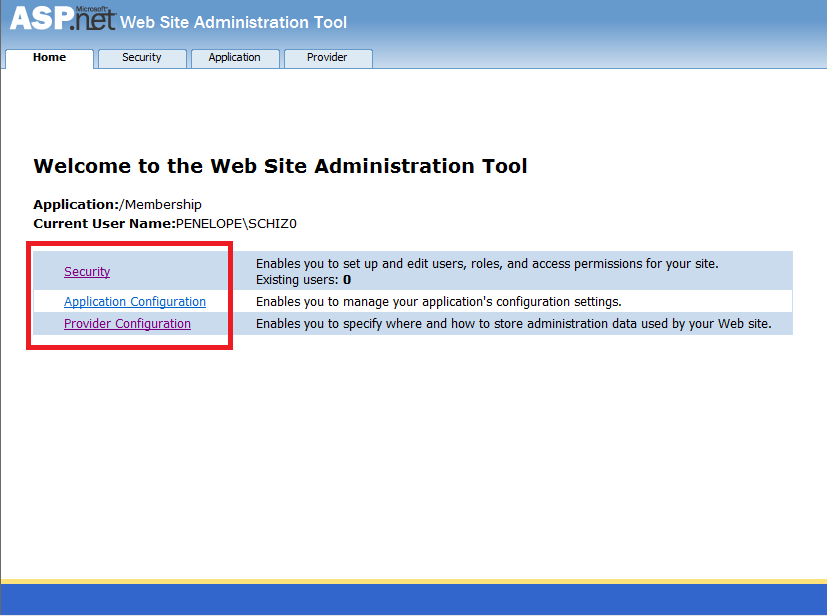
Note that this will open a website which contains the website configuration settings grouped in three categories: Security, Application Configuration & Provider Configuration.These presented options on the ASP.NET Configuration website will allow us to configurate everything, from authentication methods, users and all that other stuff to smtp mail servers (of course this is useful if our application sends emails, for instance a user password reset). Here’s what you can do on each tab:
Security.- Here you’ll be able to find the user/role configuration stuff, you’ll be able to do CRUD operations on your users and roles, and also define the access rules per user/role for your application resources.
Application Configuration.- Here, you can define application settings which are just application are keys that are going to be accessible from the <appSettings/> dictionary. Also you’ll be able to set the SMTP settings, take the application offline and set the debugging and tracing options.
Provider Configuration.- Here, you can select the providers you’ll on the application, these is very useful since you can define various providers on your web.config (if you’d like) and switch through them. For instance the settings for your application on the development environment are different from your production environment.
Also, this action will automatically create a new Database file and place it on your App_Data folder of your website/webapp. This database named aspnetdb will contain the Application Services DB schema definition.

Step 2
You just need to access the Security tab and start creating your users, roles and access rules.
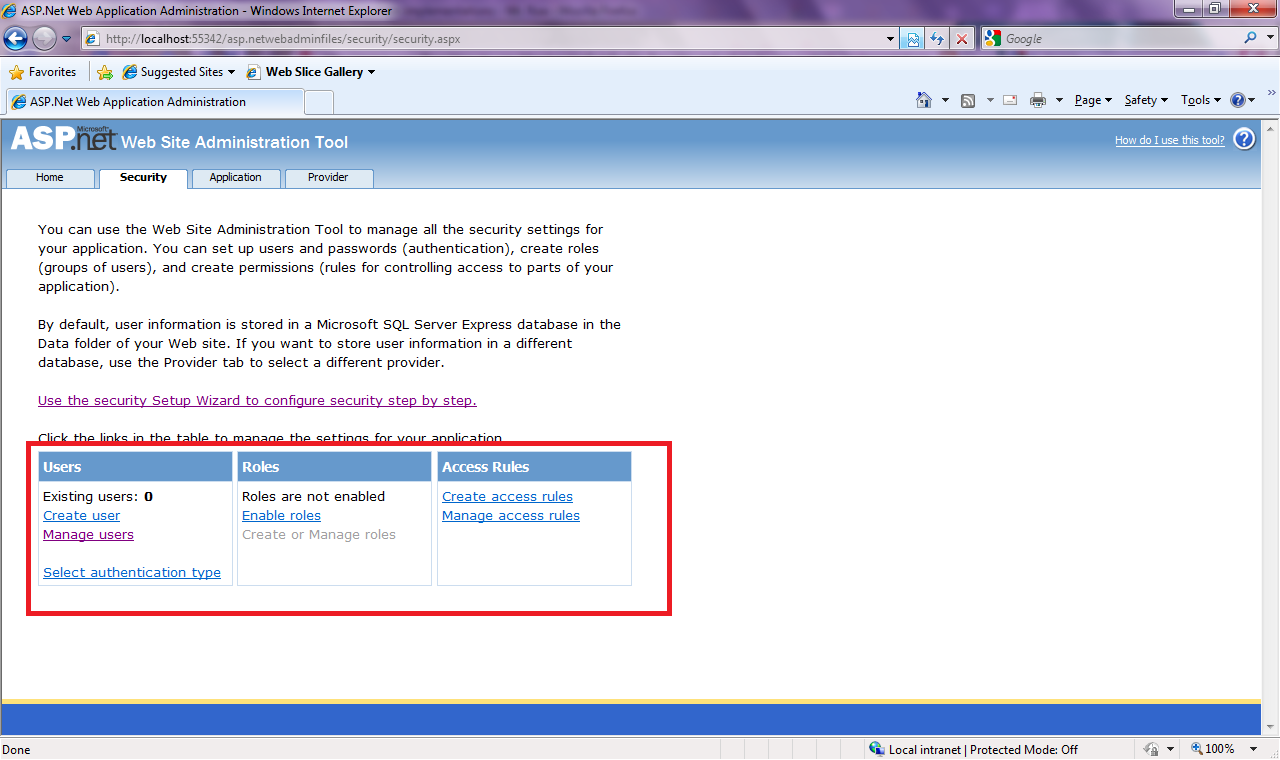
By default we have in our hands a simple yet robust implementation of user management. We are able to select the forms of authentication for our application from the provided configuration options, Windows or Forms, these options are described on the msdn documentation. When using forms authentication, the passwords of our users are going to stored on our database, by default these are going to be hashed. Also our users need to have a secret question/answer in order to reset/retrieve their passwords.
From our application will be able to access all of these user management CRUD actions by using the System.Security.Membership class.
All of the Login Toolbox controls located on the visual studio Toolboox palette, will work without writting a single line of code.
Great! But what if I want to use my own Database
So you already have designed your application database and you want include the Application Services Schema definition in it. This is a very common scenario, and you will need to do very little to get this working.
First, you need to run the aspnet_regsql command from the visual studio command prompt and go through the, fairly simple, wizard until you select and register your database. This, will copy all the Application Services tables and store procedures, that you’ll need to use the Provider Model, into your existing DB.
After that, you’ll need to define a connection string that points to that database on your web.config. This connection string will be specified on our membership provider definition.
<remove name="LocalSqlServer"/>
<add name="LocalSqlServer"
     connectionString="Data Source=.\SQLEXPRESS;Initial Catalog=MyAppDB;
     Persist Security Info=True;
     User=sa;Password=P@$$w0rd"
     providerName="System.Data.SqlClient"/>
Now we just need to define the provider and then change the membership
provider for the application to use our new one on the Provider
Configuration.
<system.web>
       <membership userIsOnlineTimeWindow="20" hashAlgorithmType="SHA1">
          <providers>
            <add connectionStringName="LocalSqlServer"
                 enablePasswordRetrieval="false"
                 enablePasswordReset="true"
                 requiresQuestionAndAnswer="false"
                 passwordFormat="Hashed"
                 applicationName="MyApplication"
                 name="MyAppMembershipProvider"
                 type="System.Web.Security.SqlMembershipProvider" />
          </providers>
       </membership>
</system.web>
Retrieving the User Unique Identifier
If you need to create a relationship between a user and any other entity by using it's unique identifier (GUID) instead of its username, you just need to retrieve it by using the read-only property ProviderUserKey from the MembershipUser class.
System.Web.Security.MembershipUsermu = System.Web.Security.Membership.GetUser();
stringusrID = mu.ProviderUserKey.ToString();
Conclusion
On this blog post, I discussed ASP.NET Membership & Role provider implementations on it's simplest form, which in my opinion should be your first option when implementing this feature, of course if the scenario allows it.
Custom implementation of the providers are not bad and I'm not against them but you should use them when its necessary.
This topic was very debated when this feature first came out, and at 4 Guys from Rolla have a very good series of articles that go in depth on the subject, I encourage you to read it if you are interested on learning how this thing works.